Showing posts with label Vintage Jar. Show all posts

Wednesday, April 5, 2023

Tranquil Tulips Cards with Marie and Catherine

Hello Everyone, Marie here! Spring is one of my most favorite times of the year because everything is beautiful and flowers are blooming left and right. If I could think of a flower that is the quintessential Spring flower, tulips definitely come to mind first! That being said, I am excited to share my latest inspiration card that features Sunny Studio Stamps' Tranquil Tulips Stamps. This layering stamp set allows you to quickly create gorgeous tulips during their different stages of bloom. This set is perfect for mass producing cards! 

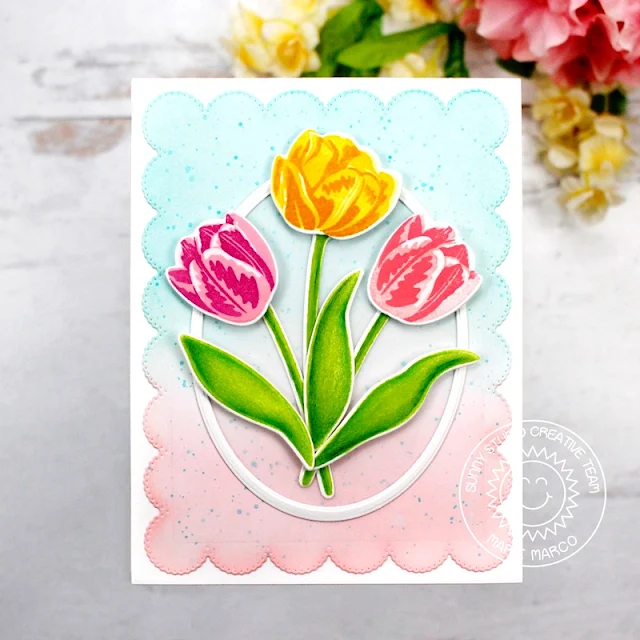
Sunny Studio Stamps: Tranquil Tulips Card by Marie Marco (featuring Loopy Letters Dies, Frilly Frame Dies)

My card today has a very simple design. To start,  I die cut an A2 sized base panel from 110 lb. Neenah Solar White Cardstock. For my background panel I used the Frilly Frames Eyelet Lace Die. I love the scalloped border this die creates! Then taking some Salvaged Patina Distress Oxide Ink, I lightly inked a little more than half the panel, and finished distress inking the rest with Saltwater Taffy Distress Oxide Ink. I also splattered some Salvaged Patina throughout the panel for a little texture. I then  adhered the background panel to the base panel using double sided tape adhesive. 

Next step was to stamp out all my lovely tulips onto Neenah Solar White Cardstock. Each layering flower stamp is individually labeled so it's easy to follow which order they go in. For each tulip bloom, I used three different colors with 3 different ink tones. For the purple tulip, I used a very light Princess Pink Dye Ink for the base, and then a slightly darker Pink in the shade Cotton Candy Dye ink  for the mid tone.These two inks are from MFTstamps. The darkest shade I used is Seedless Preserves Distress Oxide which is a purple that compliments the pink layers very well. For my full bloom yellow tulip, I used Lemon Chiffon Dye Ink, followed by a darker Lemon Drop Dye ink from MftStamps, and the darkest Ink is Fossilized Amber Distress Oxide Ink. 

Sunny Studio Stamps: Tranquil Tulips Card by Marie Marco (featuring Loopy Letters Dies, Frilly Frame Dies)

To make the base of the flower a little darker giving it a more defined gradient, I added a touch of Wild Honey Distress Oxide Ink only to the base. For the pink tulip, I used Spun Sugar Distress Ink, Saltwater Taffy Distress Ink, and finally Worn Lipstick Distress Oxide as the darkest shade. For all the stems and leaves, I used a bright green Twisted Citron Distress Ink, and then Polychromos Color pencils to add some shading. I cut out all the images using the corresponding Tranquil Tulips Dies.

To highlight their beauty, I kept my design very simple by placing all three tulips inside a white oval frame that I created using two oval nesting dies. I gave the flowers dimension by adhering each one with foam tape. I also used foam tape on all the leaves. For the inside of my card, I lightly inked the center of an oval with Salvaged Patina and added a single stemmed tulip, placed off to the side, to create room for my "You're the Best" sentiment. My sentiment was created using the Loopy Letter Dies which I cut from a gold metallic cardstock. 

That concludes this week's card inspiration using the awesome Tranquil Tulips Layering stamps! I had a lot of fun experimenting with various different inks to create the perfect tulip colors! I hope this inspires you to create more Spring projects especially for the upcoming Easter holiday! Thanks so much for joining me today and until next time, Happy Cardmaking! 

-----------------------------------------

Hello Crafty Friends! Catherine here, and today I am sharing some floral gift tags created with Tranquil Tulips Stamps and Vintage Jar Stamps.

Sunny Studio Stamps: Tranquil Tulips Gift Tags by Catherine Cohen (featuring Vintage Jar)

To start, I die-cut the tulips, leaves, and stems, with white cardstock using the coordinating Tranquil Tulips Dies. I placed the die cut images back into the negative spaces. I stamped the images layer by layer with the following Altenew inks:

Yellows: Citrus Burst, Fresh Lemon, Maple Yellow
Pinks: Frosty Pink, Cotton Candy, Coral Berry
Purples: Soft Lilac, Wisteria, Lavendar Fields
Greens: Firefly, Grass Field

I added some highlights onto the tulips and leaves with a white gel pen.

Sunny Studio Stamps: Tranquil Tulips Gift Tags by Catherine Cohen (featuring Vintage Jar)

For the jar, I die cut 6 jars (3 for the front and 3 for the back) out of white cardstock using Vintage Jar Dies. I placed 3 of the jars back into the negative space and stamped the jar using Vintage Jar Stamps with Lawn Fawn Kiddie Pool Ink. I set the 3 jars aside for the back of the tags.  For the front of the jars, I placed the remaining 3 white cardstock jars back into the negative space and stamped the stem images. Next, I stamped the jar on top of the stems using Vintage Jar Stamps and Lawn Fawn Kiddie Pool Ink.

I adhered the tulips, stems, and leaves onto the back of the jar fronts and then glued on the back of the jars. I tied some brown string around the top of the jars. I added tags from Window Quad Square Dies using paper from Gingham Pastels Paper. I added a “thanks” sentiment in the Tranquil Tulips Stamps set using the pennant from Fancy Frames Rectangle Dies.

Thank you so much for joining me today! I would love for you to visit me at Crafti-Cat! Have a lovely day!

Sunny Studio Supplies Used:

Vintage Jar Dies
Vintage Jar Dies
Shop at:
Sunny Studio
Vintage Jar Stamps
Vintage Jar Stamps
Shop at:
Sunny Studio
Fancy Frames- Rectangles
Shop at:
Sunny Studio
Loopy Letters Dies
Loopy Letters Dies
Shop at:
Sunny Studio
Gingham Pastels 6x6 Paper
Shop at:
Sunny Studio
Frilly Frames-Eyelet Lace
Shop at:
Sunny Studio
Window Quad Square Die
Shop at:
Sunny Studio
Tranquil Tulips Stamps
Shop at:
Sunny Studio
Tranquil Tulips Dies
Shop at:
Sunny Studio

Friday, January 20, 2023

Tranquil Tulips Cards with Tina and Vanessa

Hello crafty friends, Tina here and today I have a happy Spring bouquet for you using the new Tranquil Tulips layering stamp and die set. This set contains three beautiful tulips and several leaves to use in your flower compositions.

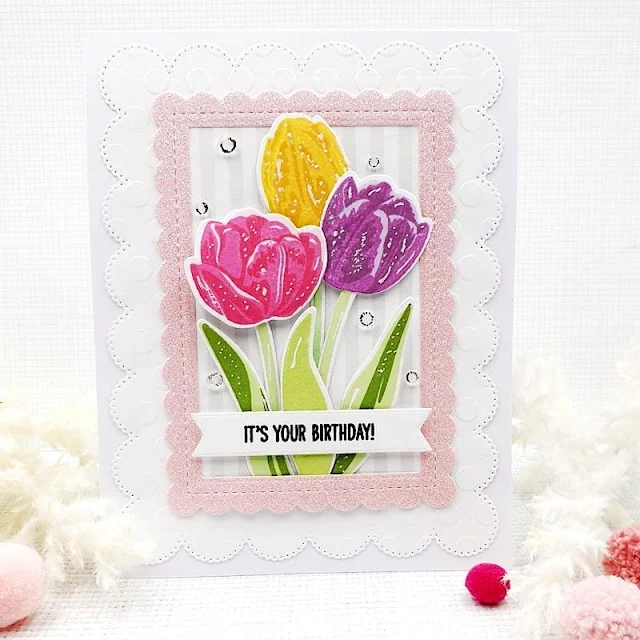
Sunny Studio Stamps: Tranquil Tulips Everyday Card by Tina (featuring Frilly Frame Dies, Mini Mat & Tag Dies)

Let’s start with our background panel for which I dry embossed a panel of Neenah Solar White paper with the Lots Of Dots embossing folder. I have been using this technique a lot lately in my projects because it gives extra dimension and detail to your card without adding any bulk. So, it’s perfect to keep your card flat to go well through the mail.

Next, I cut this embossed panel with the Frilly Frames Eyelet Lace die to give it a sweet scalloped border and glued it to a white card base. I thought it would be nice to ‘frame’ my bouquet so I created one from pink glitter cardstock using the mat die from Mini Mat & Tag 1 combined with a slightly smaller rectangle from an infinity setI backed this frame with a piece of grey and white striped paper from the Subtle Grey Tones paper pad and attached it to my background panel.

Sunny Studio Stamps: Tranquil Tulips Everyday Card by Tina (featuring Frilly Frame Dies, Mini Mat & Tag Dies)

For my bouquet, I selected bold and fresh colors using several dye inks from my stash. I added white highlights with my gel pen to the flowers and leaves. I arranged the bouquet onto the frame panel with foam tape. The sentiment was stamped onto a small white banner with my trusty Versafine Onyx Black ink and mounted to the panel. To embellish the card I sprinkled a few Chrystal Clear Jewels onto the panel.

I hope you like this sweet bouquet and got inspired to create some happy Spring cards too!  Thank you for visiting the blog and happy crafting!

------------------------------------------

Hello to you! Vanessa here with a thank you card using the beautiful Tranquil Tulips set.

Sunny Studio Stamps: Tranquil Tulips Everyday Card by Vanessa Menhorn (featuring Frilly Frame Dies, Big Bold Greetings, Watering Can, Vintage Jar)

I first used the Frilly Frames Eyelet Lace die to die-cut the lace pattern from the green card base. Now I stamped the tulips, the Watering Can, the Vintage Jar, and the "thanks" using the Big Bold Greeting Stamps and die-cut the pieces with the matching dies before adhering the elements to the card with foam tape. Finally, I added highlights with a white gel pen.

Sunny Studio Stamps: Tranquil Tulips Everyday Card by Vanessa Menhorn (featuring Frilly Frame Dies, Big Bold Greetings, Watering Can, Vintage Jar)

These lovely stamps make me want to buy some tulips! I hope I've brought a piece of spring into your home today, have a wonderful weekend!

Sunny Studio Supplies Used:

Vintage Jar Dies
Vintage Jar Dies
Shop at:
Sunny Studio
Vintage Jar Stamps
Vintage Jar Stamps
Shop at:
Sunny Studio
Lots of Dots Embossing
Shop at:
Sunny Studio
Subtle Grey Tones Paper
Shop at:
Sunny Studio
Frilly Frames-Eyelet Lace
Shop at:
Sunny Studio
Watering Can Stamps
Watering Can Stamps
Shop at:
Sunny Studio
Watering Can Dies
Watering Can Dies
Shop at:
Sunny Studio
Mini Mat & Tag 1 Dies
Shop at:
Sunny Studio
Big Bold Greetings Stamps
Shop at:
Sunny Studio
Big Bold Greetings Dies
Shop at:
Sunny Studio
Tranquil Tulips Stamps
Shop at:
Sunny Studio
Tranquil Tulips Dies
Shop at:
Sunny Studio

Monday, January 9, 2023

Sneak Peek: Spring Bouquet, Tranquil Tulips & Big Bold Greetings Stamps

Hello and welcome to the first day of our Spring Sneak Peek Week!  All this week I will be sharing cards showcasing our newest collection which will be available for purchase this Friday!

Card No. 1: Today I am kicking things off with two brand new layering stamp sets and one everyday sentiment stamp set called Big Bold Greetings. For this card I used the new layered iris, daffodil and hyacinth flowers from our new Spring Bouquet Stamps. To hold my floral arrangement, I turned to our Watering Can Stamps which I stamped in a sunny yellow ink combo.

For my larger 5x7 card base, I inked some Tumbled Glass distress ink in the middle of my white cardstock panel and then created a wood embossed "table" using our Woodgrain Embossing Folder. To give my wood a darker color in the recessed portions like letterpress printing, I used an ink brayer to apply VersaFine Clair Acorn Ink directly to the raised surface of my plastic embossing folder before sandwiching my paper to run through my die-cutting machine. Pigment ink is a must for this technique as it will adhere and apply smoothly on the plastic surface and not bead up like a dye ink would. For my gingham napkin, I cut a piece of patterned paper from our Joyful Holiday Paper pack using our Stitched Rectangle Dies. Lastly, I added my "thank you" words using our new Big Bold Greetings Stamps.
Sunny Studio Flowers Floral Arrangement Thank You Card (using Spring Bouquet, Big Bold Greetings & Watering Can Stamps, Woodgrain Embossing Folder & Joyful Holiday Paper)

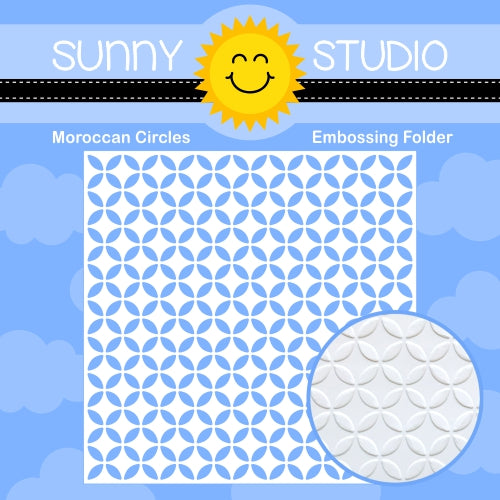
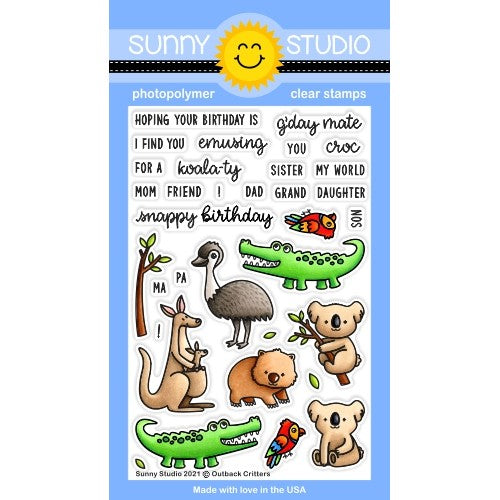
Card No. 2: Next up is a card showcasing the daffodil image from the Spring Bouquet Stamps. I love that simply by changing the angle for this single flower image, you can still create a card that doesn't feel too repetitive. I embossed the navy cardstock for my background using our Moroccan Circles Embossing Folder and then cut my scalloped strip both along the top and bottom using our new slimline style Ribbon & Lace Border Dies (which I will be sharing more peaks of later in the week). Lastly, for my greetings I paired the "hello" from this Spring Bouquet Stamp set with the word "sweet" from our Sealiously Sweet Stamps and the word "friend" from our Outback Critters Stamps.Sunny Studio Hello Friends Navy Scalloped Daffodil Card (using Spring Bouquet, Moroccan Circles Embossing Folder and Ribbons & Lace Border Dies)

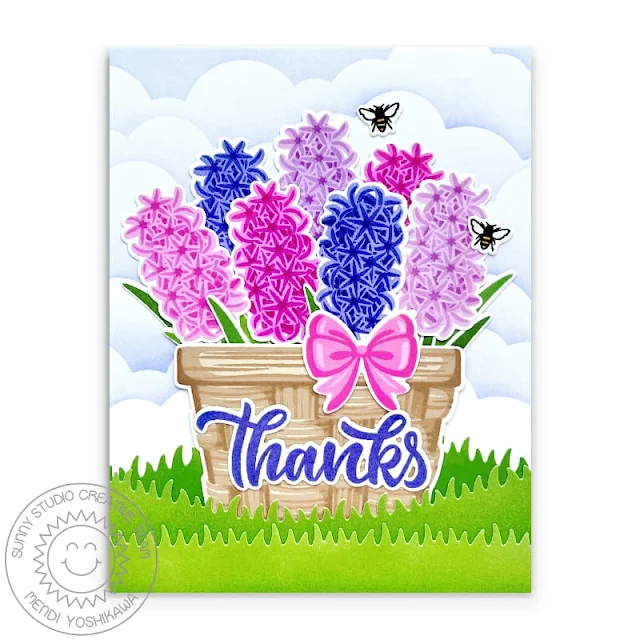
Card No. 3: This next card focuses on the hyacinth flowers from the Spring Bouquet Stamp set which I arranged using our Layered Basket Stamps. For my background, I inked layers of fluffy clouds using masks I die-cut with our Slimline Nature Border Dies and Shaded Lilac Distress Ink. I then used the grassy border from that same die set to cut layers of grass to nestle my basket between, along with the straight grass border from our Picket Fence Dies. Finally I added two little bumblebees from the set with a bow from our Winter Wreaths Stamps and the "thanks" sentiment from our Big Bold Greetings Stamps.Sunny Studio Hyacinth Floral Flowers Thank You Card (using Spring Bouquet, Big Bold Greetings & Layered Basket Stamps, Slimline Nature Border Dies)


Card No. 4: For this pop-up box style card (using Lawn Fawn's scalloped box card pop-up die) I created an exploding flower garden that magically folds to lay flat in the envelope for mailing. I mixed the flowers from both our new Spring Bouquet Stamps and Tranquil Tulips Stamps, adding four separate internal tiers within the box to attach my flowers to for a more full, staggered appearance.
Sunny Studio Floral Flower Pop-up Box Card (using Tranquil Tulips & Spring Bouquet Stamps, Hayley Alphabet Dies & Classic Gingham Paper)

Side View: To decorate my box, I cut panels using both sides of our Classic Gingham Paper cut from a coordinating green color to compliment my flower stems. I then cut out the letters from white cardstock to spell out the word "spring" using our new Hayley Alphabet Uppercase and Hayley Alphabet Lowercase Dies (which I will be sharing more as the week progresses). To finish out my "Spring Greetings" phrase, I heat embossed the word "greetings" using our older retiring Timeless Tulips Stamps.
Sunny Studio Floral Flower Pop-up Box Card (using Tranquil Tulips & Spring Bouquet Stamps, Hayley Alphabet Dies & Classic Gingham Paper)

Card No. 5: Switching my focus to our new Tranquil Tulip Stamps, I have a sweet birthday card featuring potted tulips with the flower pot I borrowed from our Potted Rose Stamps. I actually created this card with just two stamped flower pots, but I cut one in half so I could give the illusion there were three lined up in a row and running off the edge of my card. To add the stitched and scalloped edges along the top and bottom of my card, I turned once again to our new slimline style Ribbon & Lace Border Dies. Lastly I stamped and die-cut the "happy birthday" phrase in Lavender ink to match one of my tulips using our new Big Bold Greetings Stamps and coordinating dies.Sunny Studio Blog: Layered Spring Flowers in Flowerpot Birthday Card (using Tranquil Tulips, Potted Rose, Big Bold Greetings Stamps & Ribbons and Lace Border Dies)

Card No. 6: I couldn't resist creating a Valentine's Day inspired floral arrangement using the new Tranquil Tulips Stamps together with our Vintage Jar Stamps. This time rather than cut out the individual stems using the coordinating dies, I just stamped them directly onto my jar to give my arrangement a more realistic look and to save myself the extra step. It also gave me a nice flat surface to adhere my love themed greeting to using our Lovey Dovey Stamps. For my card background I cut a panel of green gingham patterned paper from our Joyful Holiday Paper pack and topped it with a scalloped "V" shaped panel using our Fishtail Banner II Dies and the stitched edge from our new Ribbon & Lace Border Dies. I just adore this complimentary color scheme!Sunny Studio Floral Flowers in Jar Scalloped Valentine's Day Card (using Tranquil Tulips, Lovey Dovey & Vintage Jar Stamps, Slimline Basic Border & Fishtail Banner II Dies, Joyful Holiday Paper)


Card No. 7: Keeping with that same color scheme, my last card of the day features a gorgeous tulip field utilizing the same new Tranquil Tulips Stamps. Before I started adhering my flowers to my card base, I applied some Twisted Citron Distress ink around the bottom three edges, fading it out to white in the center of my card. When I was done adhering all my tulips, I added my sentiment which I stamped onto a pennant strip cut out using our Stitched Rectangle Dies. The word "thanks" was taken directly from the Tranquil Tulips set which I paired with the phrases "a big" and "for all you do" from our Words of Gratitude Stamps. I love when I can stretch my supplies and create new looks by mixing sentiments from different sets!
Sunny Studio Tulip Fields Thank You Card (using Tranquil Tulips & Words of Gratitude Stamps, Stitched Rectangle Dies)

I frequently am asked which ink colors I used for my layered images.  While I think there are so many great options out there, these are the colors I used today for my stamped images from light to dark:

Peach Tulips
PinkFresh Ballet Slipper
Gina K. Innocent Pink
PinkFresh Coral Reef

Red Tulips
Hero Arts Cotton Candy
Hero Arts Pale Tomato
Gina K. Red Velvet


Deep Red Tulips
Concord & 9th Honeysuckle
PinkFresh Candy Apple
Concord & 9th Cranberry

Hot Pink Tulips
Gina K. Bubblegum Pink
Hero Arts Ultra Pink
Gina K.Passionate Pink

Purple Tulips
PinkFresh Soft Lilac
PinkFresh Lavender
Gina K. Wild Lilac

Daffodil
PinkFresh Sunshine
PinkFresh Sweet Mustard
PinkFresh Marigold
PinkFresh Apricot

Iris
PinkFresh Lavender
Gina K. Wild Lilac

Hero Arts Grape Juice
PinkFresh Sweet Mustard

Hot Pink Hyacinth
PinkFresh Sparkling Rose
PinkFresh Bubble Gum
Gina K.Passionate Pink

Pink Hyacinth
Gina K. Bubblegum Pink
PinkFresh Sparkling Rose
PinkFresh Bubble Gum

Lavender Hyacinth
PinkFresh Soft Lilac

Lawn Fawn Fresh Lavender
PinkFresh Lavender

Periwinkle Hyacinth
Simon Says Stamp Hydrangea
Ranger Archival Violet
MFT Purple Rain (retired)

Leaf 1
Gina K. Lucky Clover (or Hero Arts Fresh Lawn)
PinkFresh Olive

Leaf 2 
PinkFresh Key Lime
Concord & 9th Parsley

Basket (Card No. 3)
Hero Arts Soft Sand
Gina K. Sandy Beach
Concord & 9th Wheat or Gina K. Kraft
Hero Arts Cup O' Joe

To help you line up our layered stamps like a pro I've created a special layering guide (you can click on the photo below to view it larger).  The guide shows the stamps starting with the lightest ink color, working towards the darkest, but sometimes I find it easier to start backwards. They both work depending on what your preference is.  The black outline indicates where that layer touches the previously stamped layer.  :)


That wraps up today's sneak peek. I'm so happy you joined me today! I'd love to give a $50 gift code to one lucky winner using the rafflecopter below. Our daily sneak peek contests run through Saturday, January 14th at Midnight PST with the winners announced here on Sunday, January 15th. :)

a Rafflecopter giveaway

Here's a closer look at the our new Spring Bouquet Stamps & Dies, Tranquil Tulips Stamps & Dies and Big Bold Greetings Stamps & Dies used today and available for purchase on Friday, January 13th.

Sunny Studio Blog: Spring Bouquet Floral Flowers Layering 4x6 Clear Photopolymer Stamps Sunny Studio Blog: Spring Bouquet Floral Flowers Layering Metal Cutting Dies

Sunny Studio Blog: Tranquil Tulips Floral Flowers Layering 4x6 Clear Photopolymer Stamps  Sunny Studio Blog: Tranquil Tulips Floral Flowers Layering Metal Cutting Dies

Sunny Studio Blog: Big Bold Greetings Everyday Sentiments 4x6 Clear Photopolymer Stamps Sunny Studio Blog: Big Bold Greetings Everyday Sentiments Metal Cutting Dies

Other Sunny Studio Supplies Used (some items are not available until January 13):

Fishtail Banner II Dies
Shop at:
Sunny Studio
Timeless Tulips Stamps
Shop at:
Sunny Studio
Stitched Rectangle Dies
Shop at:
Sunny Studio
Words of Gratitude Stamps
Shop at:
Sunny Studio

Moroccan Circles Embossing
Shop at:
Sunny Studio
Sealiously Sweet Stamps
Shop at:
Sunny Studio
Slimline Nature Borders
Shop at:
Sunny Studio
Layered Basket Stamps
Shop at:
Sunny Studio
Layered Basket Dies
Layered Basket Dies
Shop at:
Sunny Studio
Lovey Dovey Stamps
Lovey Dovey Stamps
Shop at:
Sunny Studio
Lovey Dovey Dies
Lovey Dovey Dies
Shop at:
Sunny Studio
Winter Wreaths Stamps
Shop at:
Sunny Studio
Winter Wreaths Dies
Winter Wreaths Dies
Shop at:
Sunny Studio
Ribbon & Lace Dies
Ribbon & Lace Dies
Shop at:
Sunny Studio
Hero Arts White Detail
Shop at:
Sunny Studio
VersaMark Watermark Ink
Shop at:
Sunny Studio
Vintage Jar Dies
Vintage Jar Dies
Shop at:
Sunny Studio
Vintage Jar Stamps
Vintage Jar Stamps
Shop at:
Sunny Studio
Classic Gingham 6x6 Paper
Shop at:
Sunny Studio
Joyful Holiday Paper
Shop at:
Sunny Studio
Potted Rose Stamps
Potted Rose Stamps
Shop at:
Sunny Studio
Potted Rose Dies
Potted Rose Dies
Shop at:
Sunny Studio
Watering Can Stamps
Watering Can Stamps
Shop at:
Sunny Studio
Watering Can Dies
Watering Can Dies
Shop at:
Sunny Studio
Woodgrain Embossing
Woodgrain Embossing
Shop at:
Sunny Studio
Outback Critters Stamps
Shop at:
Sunny Studio
Hayley Lowercase Alphabet Dies
Shop at:
Sunny Studio
Hayley Uppercase Alphabet Dies
Shop at:
Sunny Studio

Tsukineko Jumbo Dauber
Shop at:
Sunny Studio
Versafine Onyx Black Ink
Shop at:
Sunny Studio